...
There is an option to use TLS which can be selected during install. This provides secure communications between all servers.
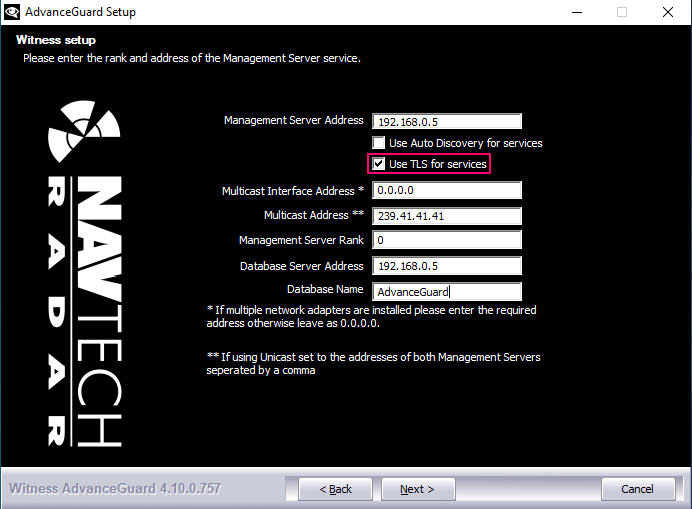

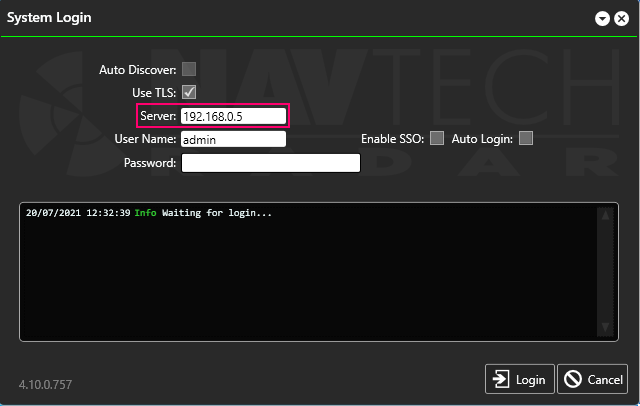
Once this is enabled during installation, any clients that accesses the system must have TLS enabled on the login screen:
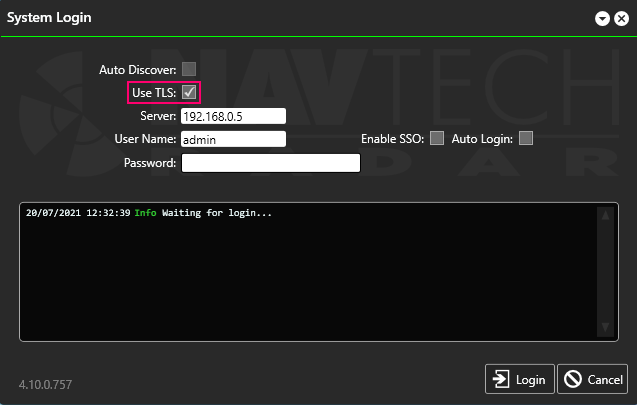
Conversely, if it wasn't enabled during install it must not be enabled during login.
...
The solution is to manually manipulate the replica set configuration after software installation. Please navigate here ReplicaSet Administration to find out how to do this.
...
Frequent Configuration Issues
Validation Errors
Sometimes when you edit an entity, the Save button will be disabled. This is caused by a validation error, which means that you have not configured the entity correctly.
Witness™ provides assistance if this occurs. To check why you cannot save an edit:
Hover your mouse over the Save button:

The system will display a tooltip with the reason why there is a problem with your configuration.
No Background Image
The problem is that the PPI Map display is not showing a background image. There are several reasons for this, as discussed below.
...
Check to see the position of the Map Transparency Slider. In the example below it is highlighted in pink and is switched off. It is located above the Picture Transparency Slider highlighted in turquoise.

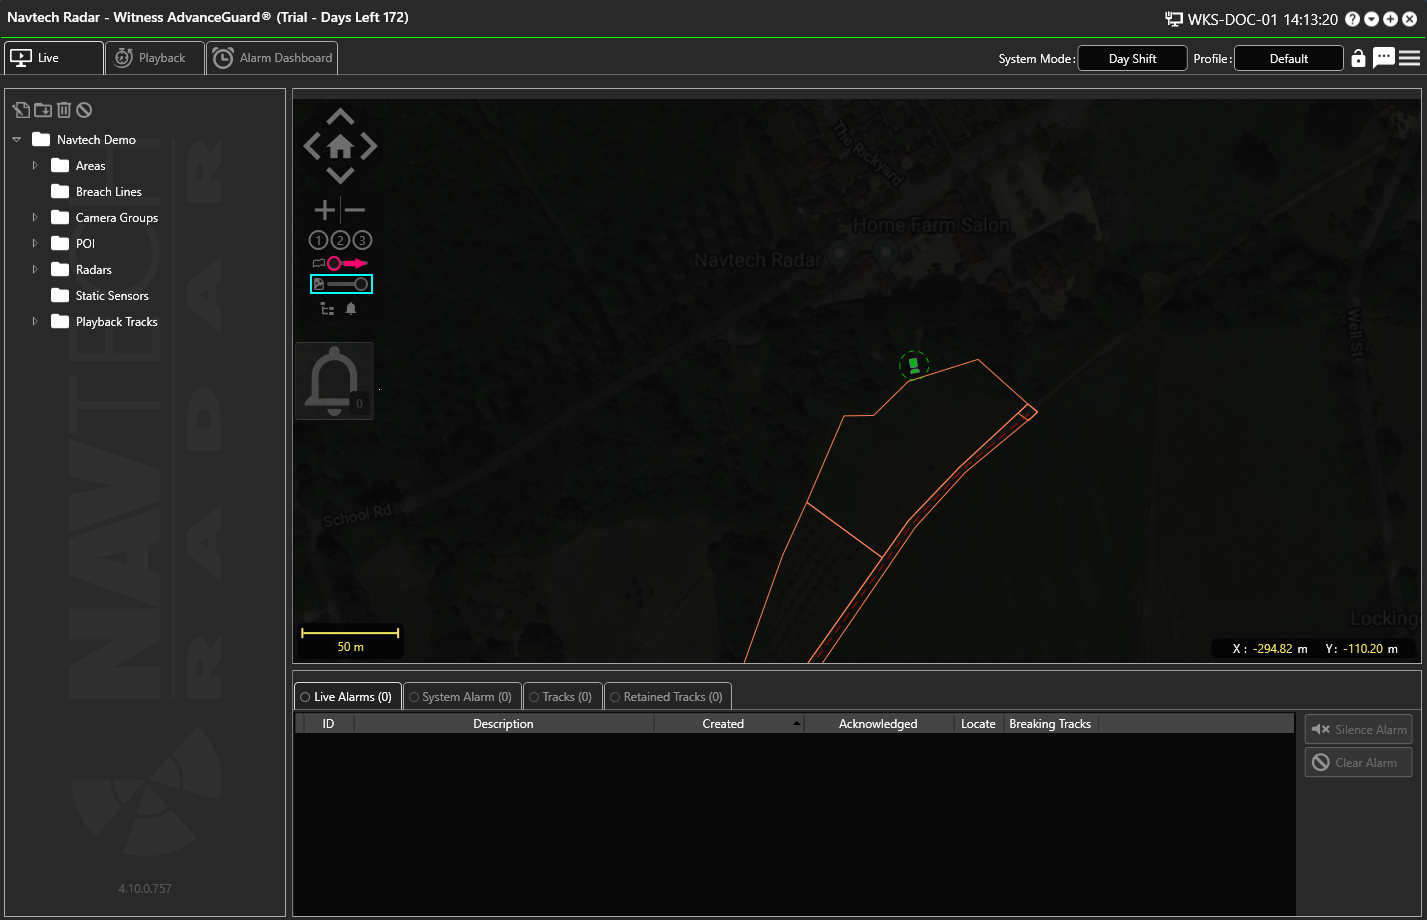
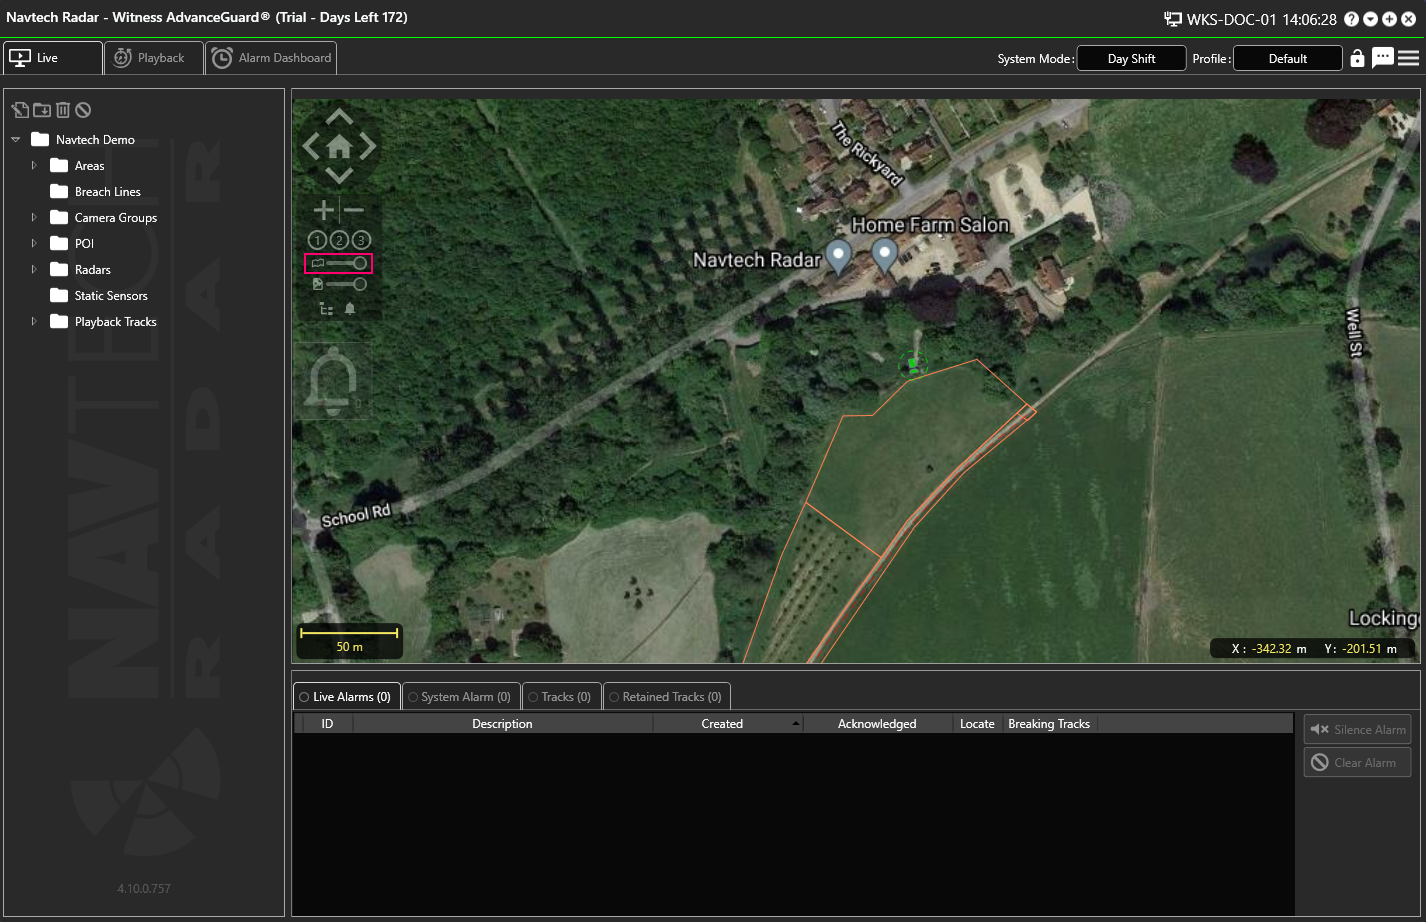
If the transparency slider is on the left, move it to the right:

No Transparency Slider
...
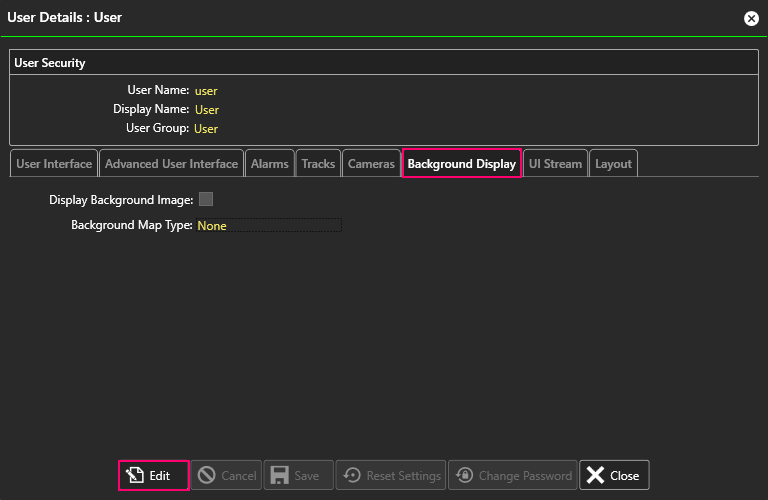
Check the settings in the User Details:

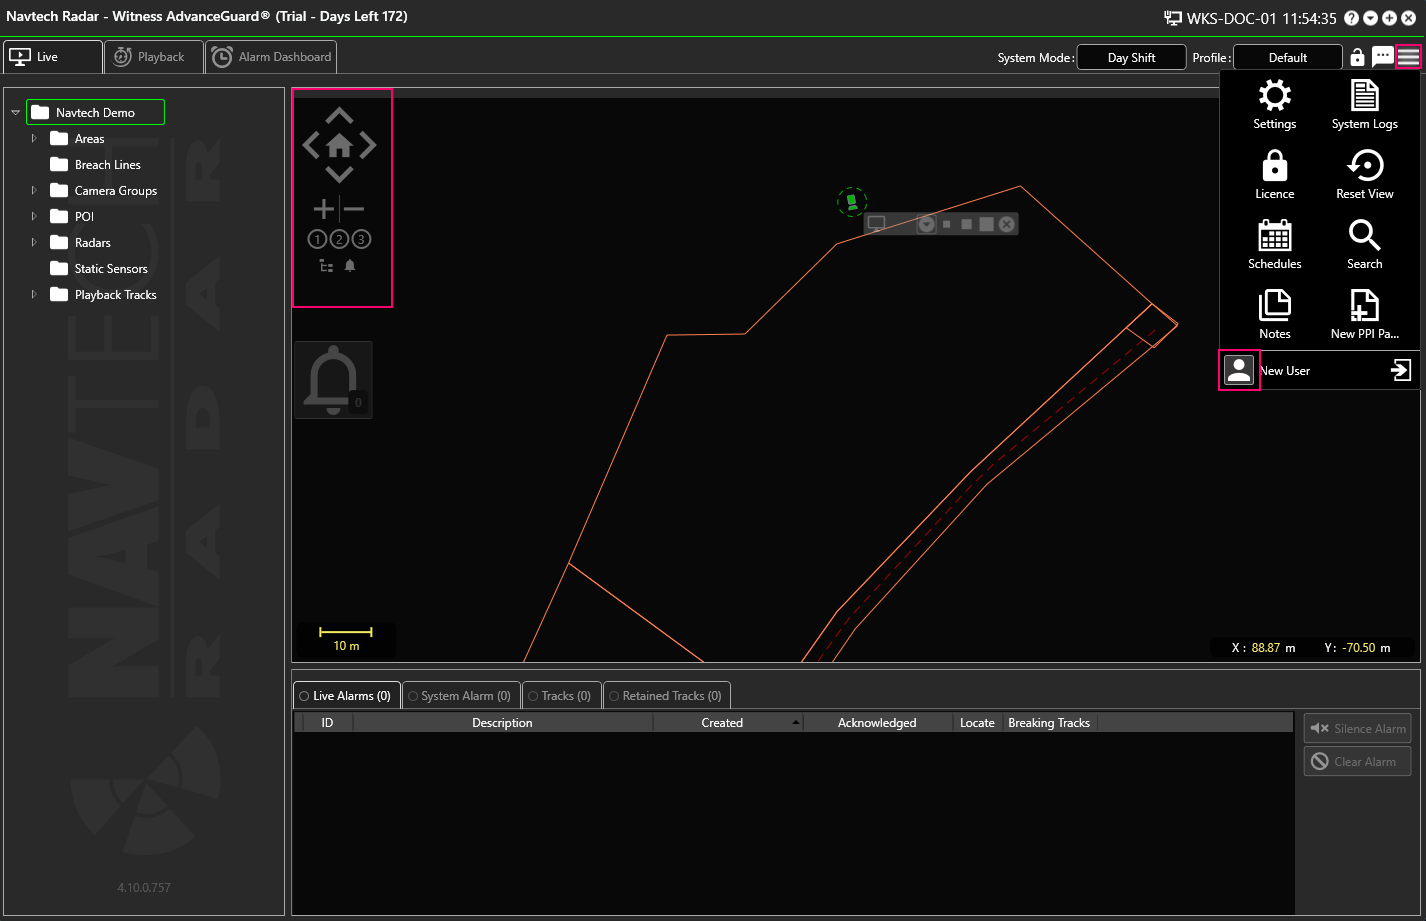
Navigate to the Background Display settings and check to see if there is a background image option selected. If there is not then you can check to see if there is a background or static image which would normally be applied.
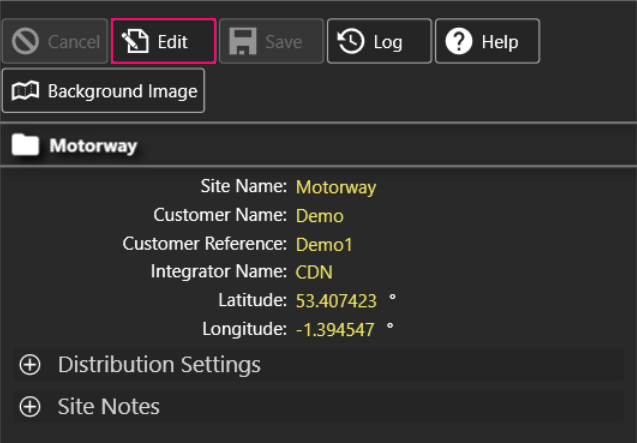
If the Background Map Type is set to None, then click Edit:

Then select either Google Map or Open Street Map from the Background Map Type drop-down list:


If you select Google Maps, there are additional options:


Make a selection and click Save.
Return to the Live screen and adjust the transparency slider if required to see the background image.
For more information about background images please see the following pages: Displaying a Map Adding a Background Image Adding a Background Image in ClearWay™.
...
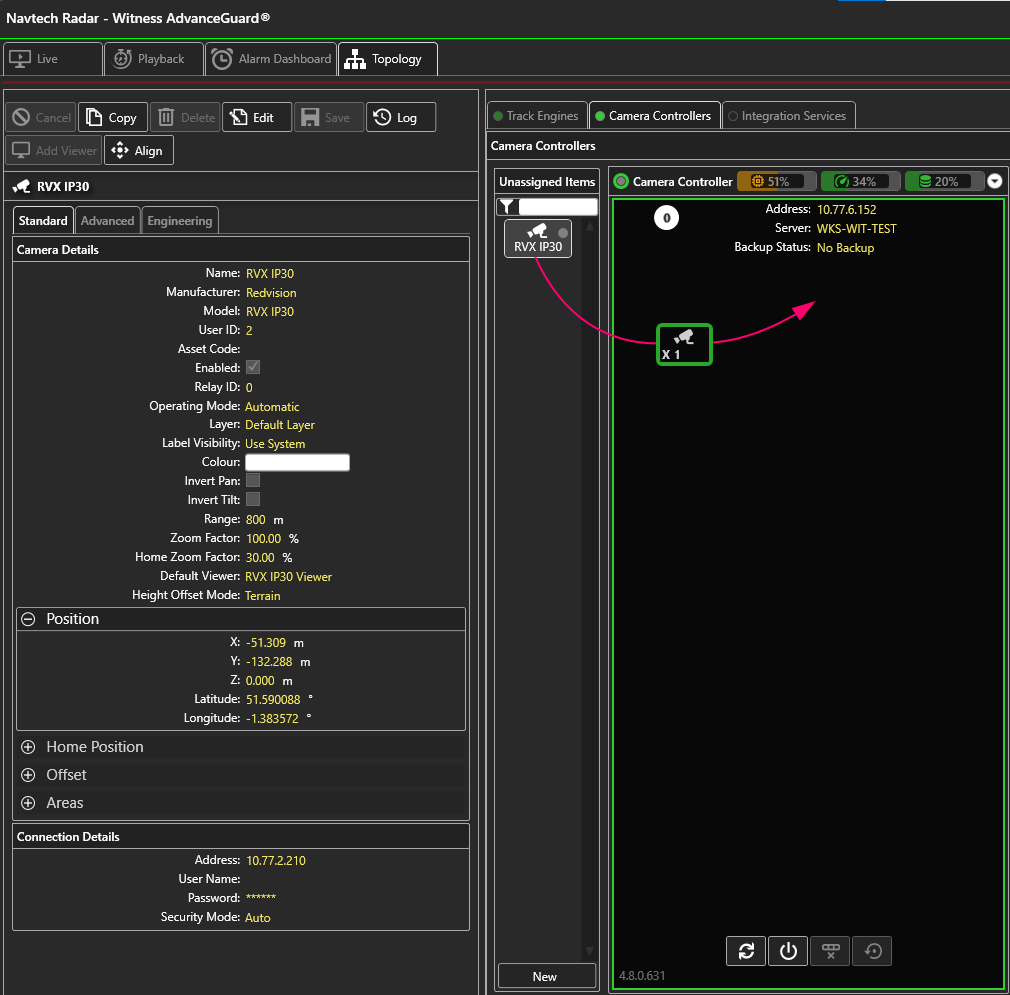
Check that the camera has been assigned to the Camera Controller:

VLC Media Player has not been installed
...
Select the site name on the Configuration Tree, which is the master folder of the Entity Tree (e.g. the site, Navtech Demo, as illustrated below):

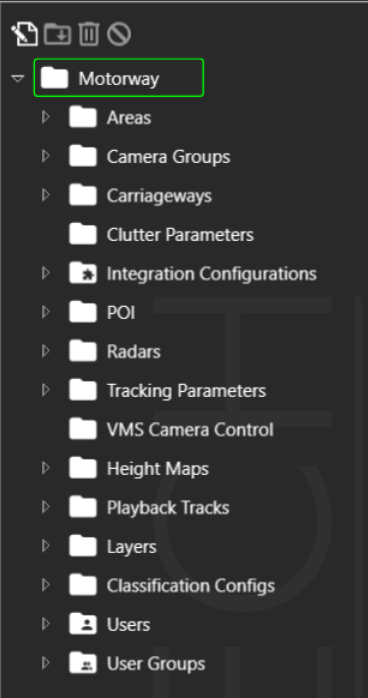
The site settings will then be displayed in the Configuration Panel:
Click Edit and select the IP address from the drop-down list (the list is auto populated by examining the IP addresses on the system running the UI application).

Add the IP Address and then click Save.
...
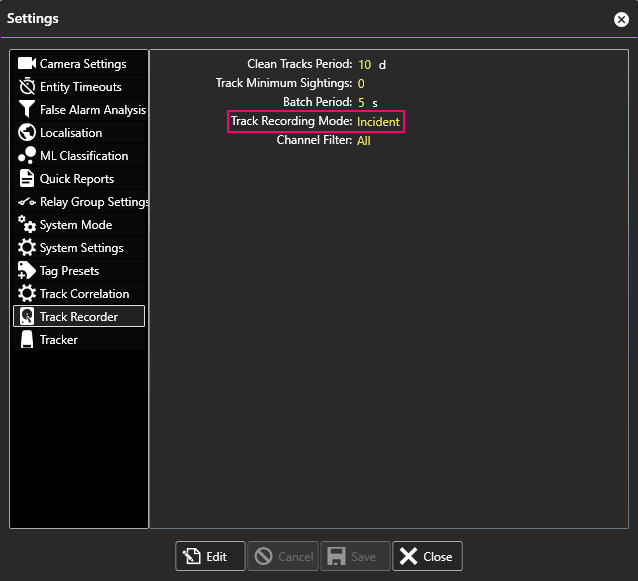
Check to see the Track Recording Mode:

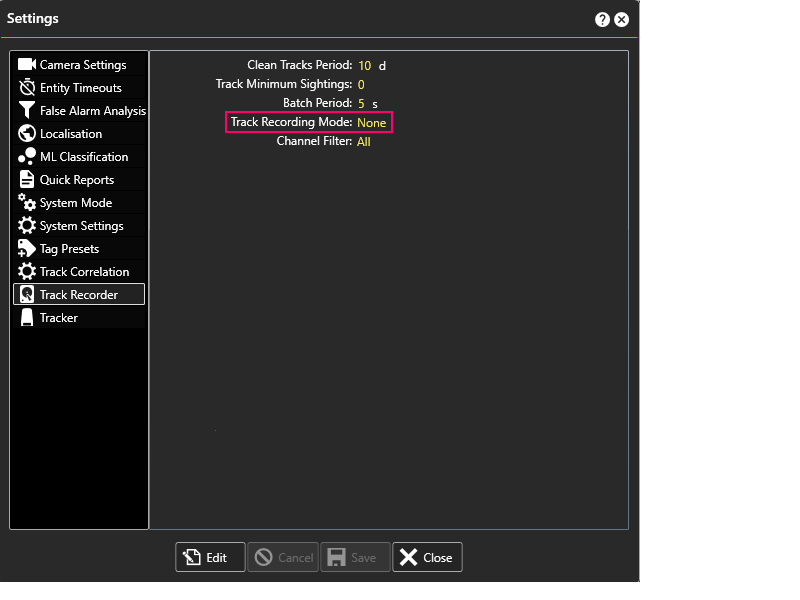
If it has been set to None then there will be no track recording.
To enable this feature, click on Edit to open the drop-down menu:

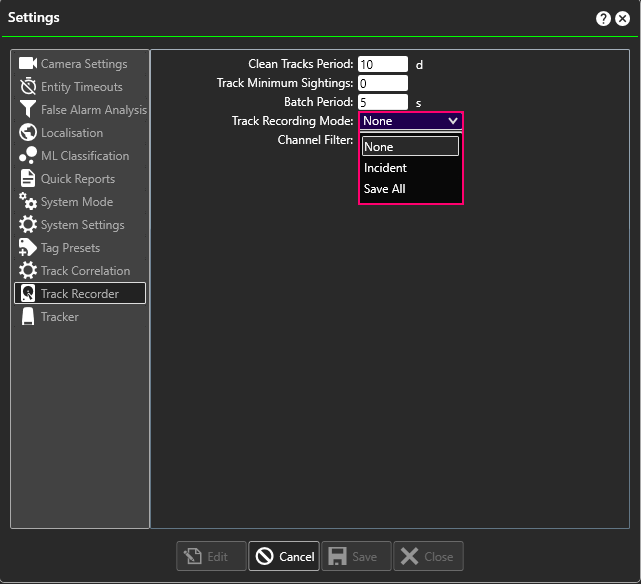
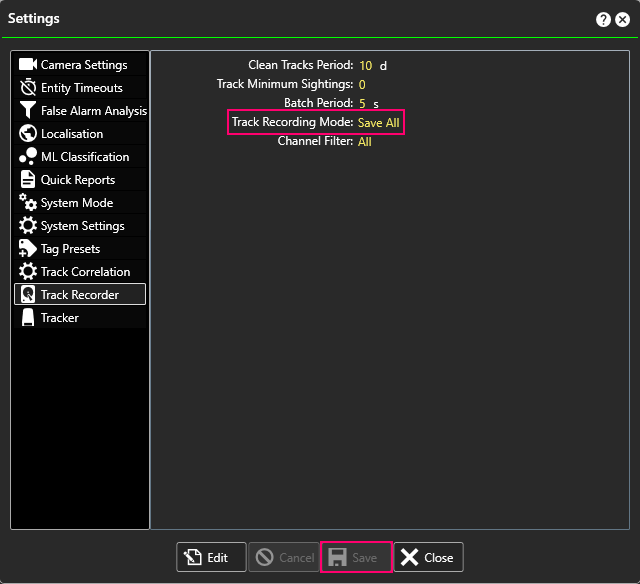
Then select Incident or Save All and click Save:

Unable to Store Track Data
...
Check that the Track Recording setting has been enabled:

It must be set to either Incident or Save All.
In ClearWay™ you will need to enable Distribute Tracks on all of your radars:
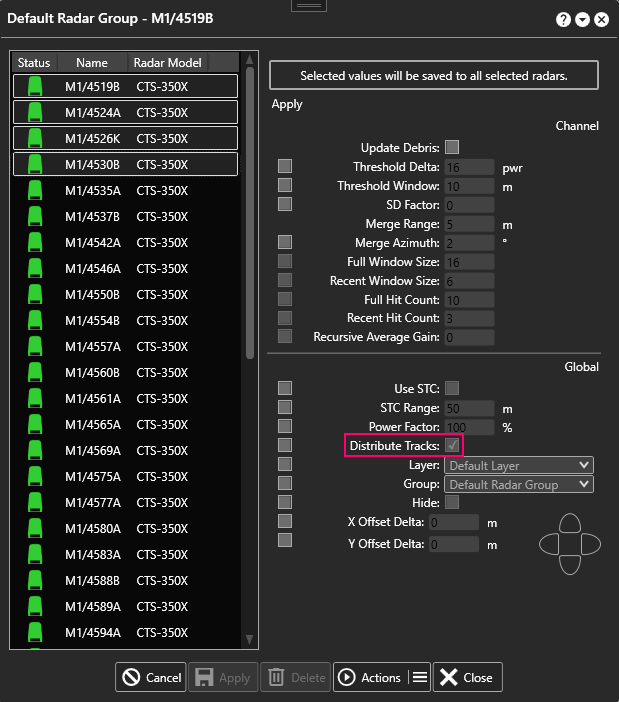

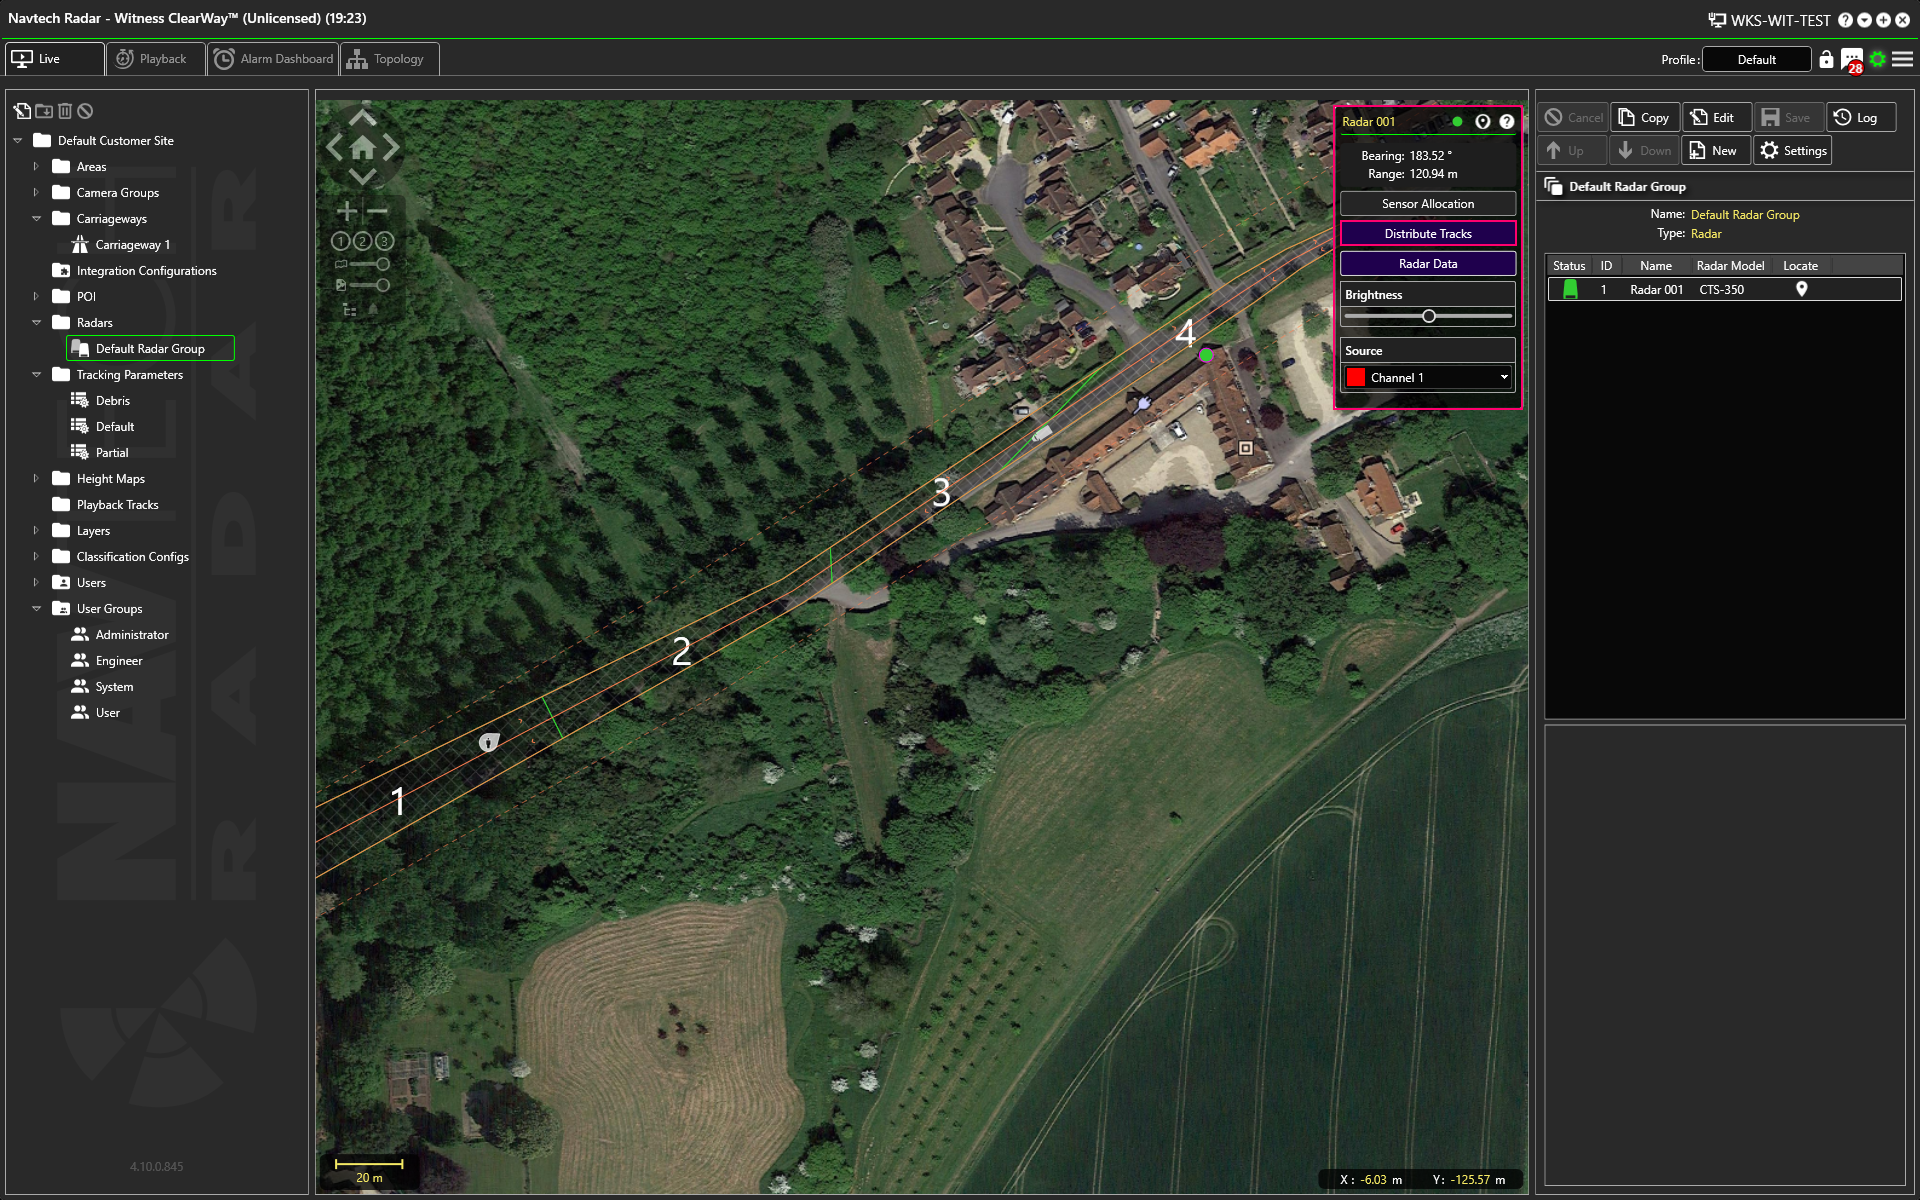
To enable the Distribute Tracks feature for an individual radar, select the desired Radar to enable the Radar Mini Controller and click the Distribute Tracks toggle on, turning the button colour from black to blue:
...
Check to see if “localhost” or ”127.0.0.1” has been used by checking the Management Server address setting when logging in:

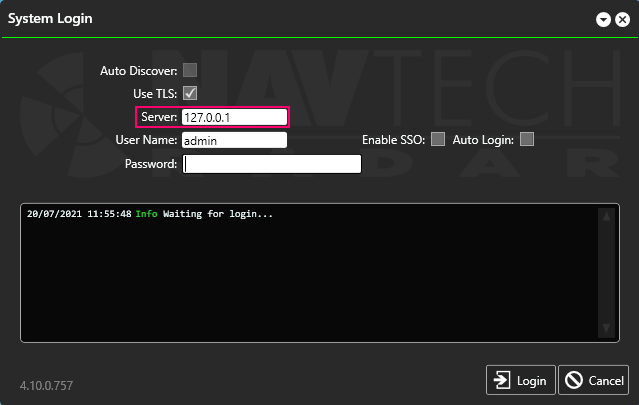
If it has then the solution to this is to uninstall then reinstall the system software with the database accessed via its outward facing IP address:

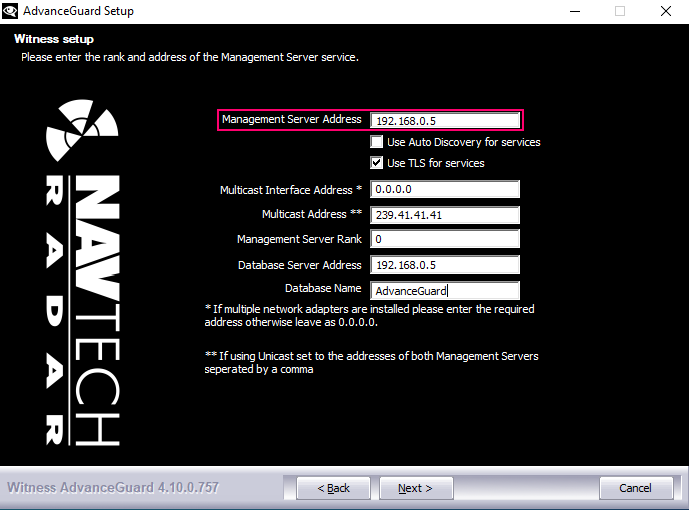
Log back in to Witness and amend the Server IP address:

There are additional tasks to ensure that your system runs smoothly:
...
Check Windows Services and ensure that the Management Server has started correctly:
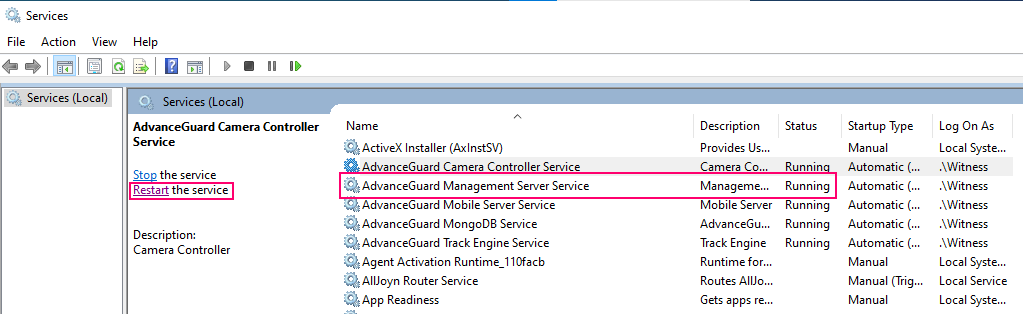

If it has not started then Restart the service.
...
To resolve this please check that you have enabled SSO:
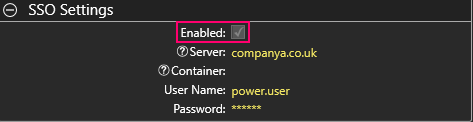

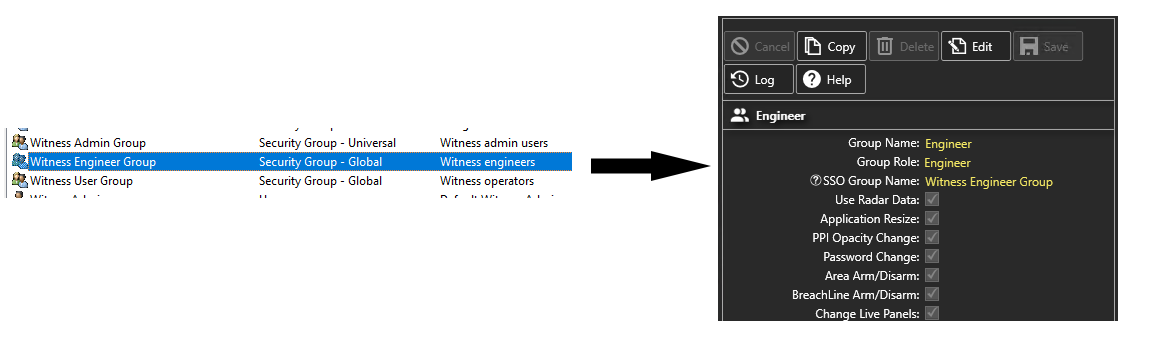
Next, check that the SSO Group Name has been configured:
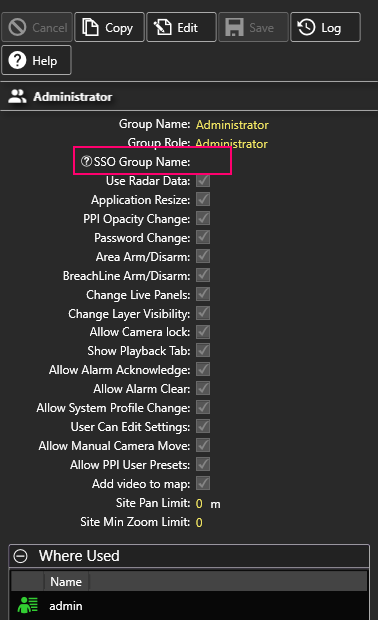

If this hasn’t been configured then select Edit to add an SSO Group Name. This name must match the exact name as it appears in the AD, as illustrated below.

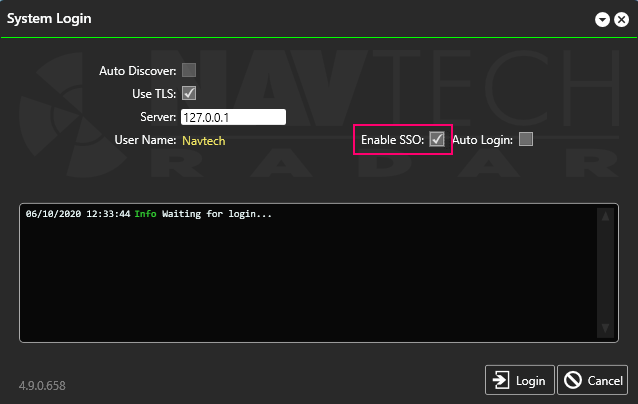
Finally, check that when logging into Witness, the Enable SSO option has been selected:
...
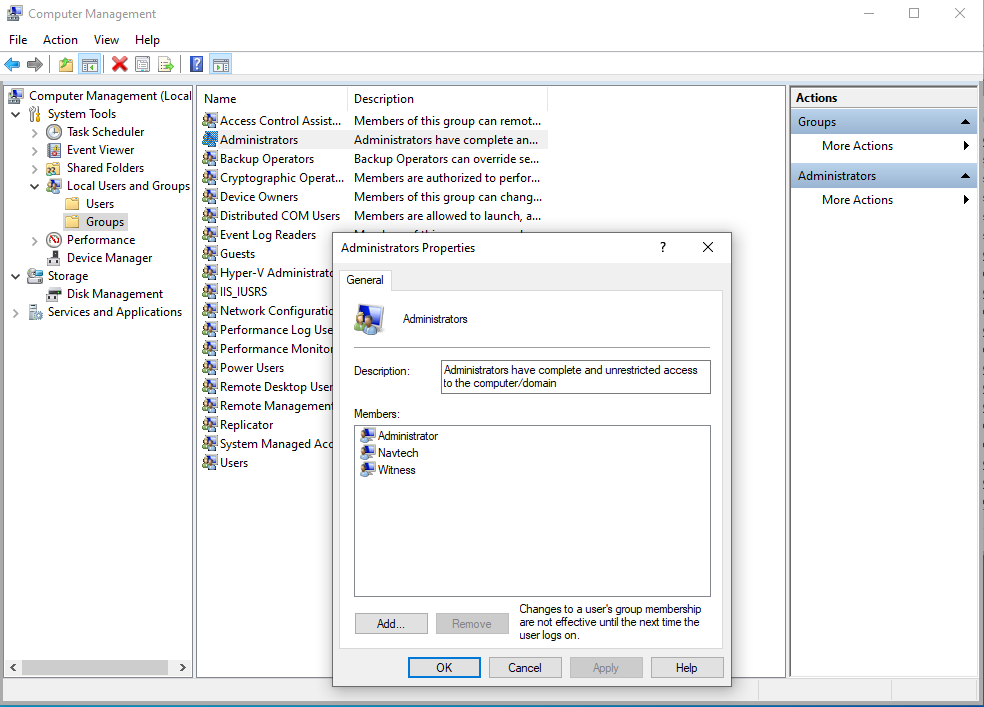
Check that the Service Account (normally “Witness”) is in the local Windows admin group:

Check that the passwords for the Windows user account and the password used on the service match. If necessary re-enter both.
...
Attempt to identify the invalid XML in the configuration file and correct it.
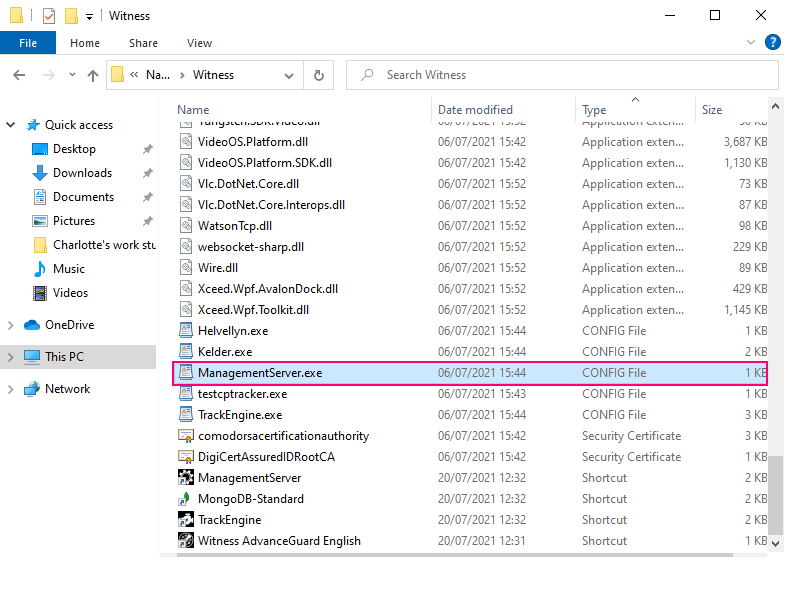

Alternatively, rename the current configuration file and allow the Management Server to create a default config file when it starts.
...