Accessing The Vertex Interface
To
access the Vertex interface
please refer to these instructions: https://navtechradar.atlassian.net/wiki/spaces/PROD/pages/29294899/Vertex+User+Guide#Accessing-the-Radar-Interface.
The Vertex Interface
You should now see the Vertex
Status page
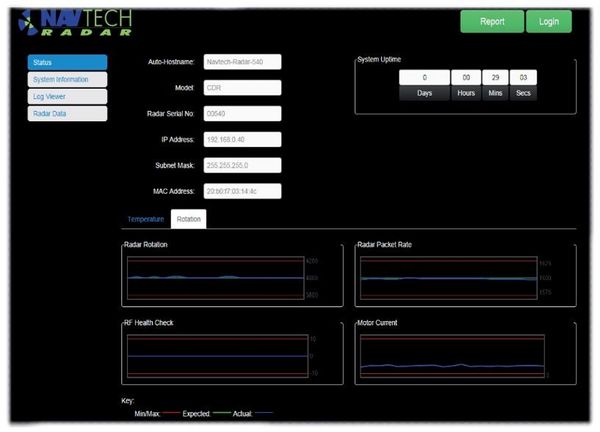
Within the basic view (when not logged in to the sensor), Vertex provides four main pages, accessible from the four buttons in the top left corner:
- Status - Displays basic static settings (i.e. auto-hostname, serial number, IP address, etc.) plus dynamic graphs (arranged on two tabs in the lower portion of the page) that provide Temperature and Rotation details.
- System Information - Provides three pages of detailed settings under the sub headings of System, Radar and Advanced. Click the System Information option to reveal the three sub-headings.
- Log Viewer - A full list of all sensor activities. Viewing is possible while not logged- in, however, you must log in if you wish to download the record.
- Radar Data - Allows you to view the live radar data.
Two other buttons are shown in green at the top right corner of the page:
.
Please refer to https://navtechradar.atlassian.net/wiki/spaces/PROD/pages/29294899/Vertex+User+Guide#Status-Page for more information.
Using the Log Viewer
The radar stores a record of activities in order to assist diagnostics. Due to memory restrictions, newer entries will overwrite the oldest and so the log does not retain all historical information.
Enter the number of records that you wish to view and click Go. The requested number of log entries will be displayed with the most recent at the top of the page: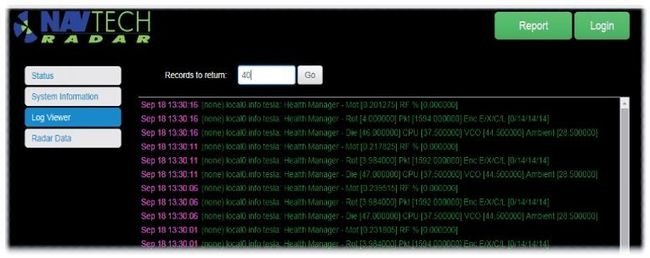
https://navtechradar.atlassian.net/wiki/spaces/PROD/pages/29294899/Vertex+User+Guide#Log-Viewer gives more information about using the Log Viewer.
Viewing Radar Data
Click on the Radar Data button to view live radar data: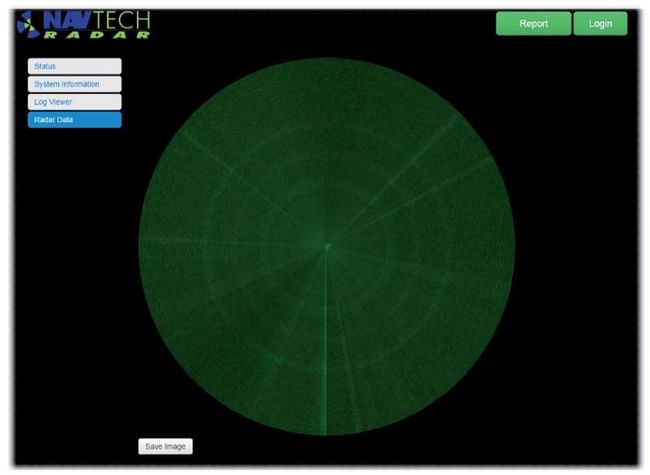
https://navtechradar.atlassian.net/wiki/spaces/PROD/pages/29294899/Vertex+User+Guide#Radar-Data provides information about viewing the Radar Data.
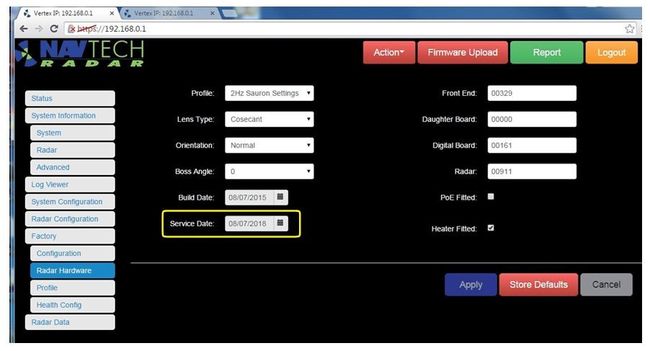
Setting the Service Date
Following a service procedure you need to register the next service due date within the radar sensor.
In order to do this, you first need to login to Vertex.
Username: user (all lower case)
Password: Navtech. (including the capital ‘N’ and the full stop)
Follow these instructions: https://navtechradar.atlassian.net/wiki/spaces/PROD/pages/2269872475/Login#User-Login-to-Vertex.
Click on the
Radar Hardware button on the left side
.
Then amend the Service Date: https://navtechradar.atlassian.net/wiki/spaces/PROD/pages/2269904897/Admin+-+Factory#Setting-the-Service-Due-Date.
Shipping Halt
In the unlikely event that there is an issue that cannot be resolved by following these instructions, you may need to ship the radar back to Navtech for analysis. For this you should perform a Shipping Halt which will safely store any required data to the radar's SD card, and halt the radar from working.
Please refer to the Shipping Halt documentation: https://navtechradar.atlassian.net/wiki/spaces/PROD/pages/2314993823/Firmware+Control+and+Upgrade#Shipping-Halt.
Further Vertex Information
Additional information regarding Vertex can be viewed in the Vertex User Guide.