
Images shown are for dish based radar
| Panel | ||||||
|---|---|---|---|---|---|---|
| ||||||
On this page:
|
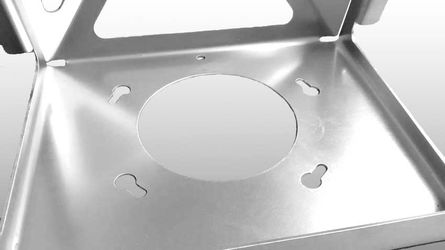
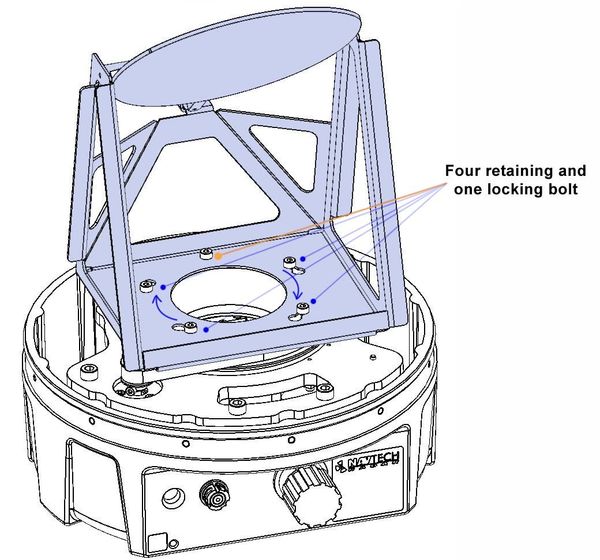
- Loosen Loosely refit the four key hole retaining bolts and remove keep the one fifth locking bolt from the top assembly. Replace to hand. If they show any burring or damage replace them with the new ones provided within the service kit if required.
It is can be important to replace these bolts at each service interval if necessary because their hex key recesses are easily weakened when the top assembly is removed, due to the Loctite applied to the threads. - Once the new bolts are loosely in place , apply Loctite 243 to their threads.
- Align the top assembly with the turntable. Ensure that the alignment tab of the top assembly is correctly aligned correct with the locking bolt hole on the turntable rotor. Rotate the aseembly assembly to lock home the key hole bolts before tightening them down.
- Add the fifth locking bolt to its hole in the assembly, checking it also has Loctite applied to its threads.
- Using a 2.5mm hex key (do not use ball ended drivers), tighten the bolts evenly to a torque of 80~100cNm). Do NOT over tighten.
- Check that the top assembly on the turntable can rotate freely.