Note: The power and data connectors connector with its cap on are hermetically sealed on this radar model and so covers are not required to if fitted will form a gas-tight seal.

| Panel | ||||||
|---|---|---|---|---|---|---|
| ||||||
On this page:
|
- Insert the pressure test gauge into the hole vacated by the pressure plug and tighten it to form an airtight seal with the enclosure.
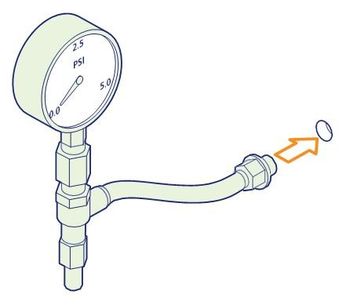
- Attach a hand or foot pump to the Schrader valve of the pressure test gauge and pressurise the enclosure to exactly approximatly 1 psi.
- Remove the pump from the pressure test gauge and allow the gauge to settle.
- After 10 5 minutes check the gauge. The pressure should remain at or around 1 psi (any heated internal components could cause the pressure to increase slightly). If the pressure has dropped by more than 10%10 to 15%, then the test has failed and your options are to either locate and correct the cause of the leak or return the enclosure to Navtech Radar for a wet pressure test. IMPORTANT: Do not put a radar unit that has failed the dry pressure test back into service as water ingress could damage the radar.
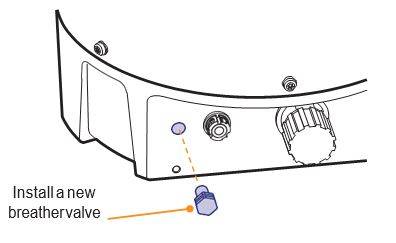
- If this dry pressure test is successful, remove the pressure test gauge and place the new breather valve (, supplied in the service kit) , into theholethe hole. Use a 16mm spanner to lightly tighten to a torque of between 0.6 and 0.8Nm - do not over tighten.
- Apply a two new warranty seal stickers to bridge the join between the radome and the chassis.
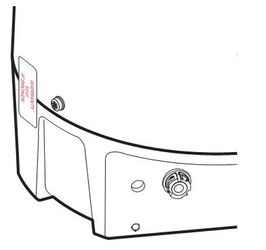
The radar unit is ready for operation and can be returned to its mounting position. - To fully complete the service procedure, you need to register the service date within the radar sensor. Please see the section 3.2 - Setting the service date and checking vital signs for details.